Roses have always been my favourite flower; I like them so much that I have two large tattoos on my left arm:

The above tattoo took about six hours and was completed in one day with a few breaks. My next rose tattoo I had done in February 2019:

This tattoo took slightly longer and was a bit sore but was worth it. Both tattoos have been completed by two different artists, but that’s ok as I like it that they are slightly different from each other.
I thought I would have a go at drawing a rose as I wanted a challenge. I knew that it was going to be difficult due to the positioning of the petals as well as the shading; I didn’t want the end result to be too dark and flat looking. Just like the previous project, I took photos of my progress of the drawing of the rose. I started off by drawing a grid in my sketch book so that I could draw a rough sketch of the rose and to get the positioning as accurate as possible. I then began the process of shading using my HB Derwent Precision mechanical pencil, an F and a B pencil along with paper stumps to blend:
I was pleased with the initial layout of the rose, but found it slightly difficult with the shading to begin with as I wanted certain petals to look as if they were standing up more than the others. The middle-sized paper stump helped with the blending and enabled me to shade accurately in different directions. The bottom right-hand petal was difficult initially as the darker part needed to look lower than the petals above it, but the edge needed to be curving down slightly. This petal took a bit of time to master.

Looking at the completed petal, it appears that I have just about been able to overcome that obstacle.
I moved on to the lower left petal and with this one, I had to try and make sure that the front part of the petal was curled into a point whilst ensuring that the petal above it looked like it was hanging over it.

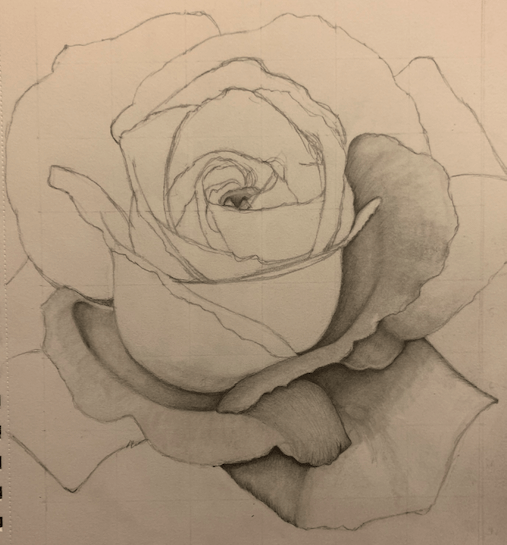
I wanted to start working on the centre of the rose and leave the larger, outer petals to the end. The middle part had to look round at the edge as well as the top part looking three-dimensional. I think I have the three-dimensional part ok, but at this stage, I wasn’t 100% happy with the shape. Time would tell whether or not it would look ok at the end.

By completing further shading on this area of the rose, the shape that I was unhappy with earlier is looking a lot better and in line with the rest of the rose. It’s beginning to take shape.

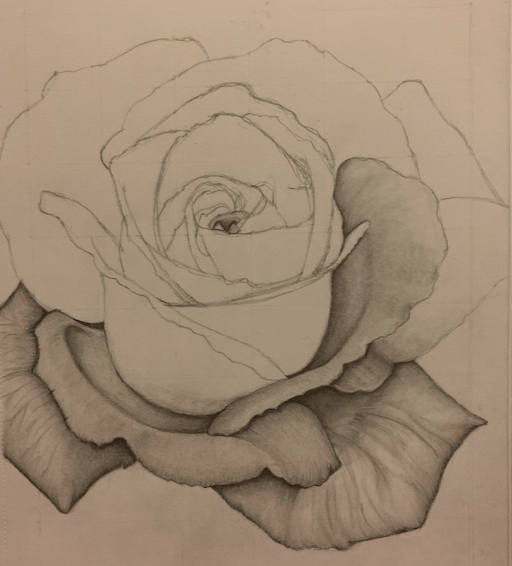
Although there isn’t much change in the two images, the centre of the rose is coming to life, and I’m happy with how the blending and shading is progressing.
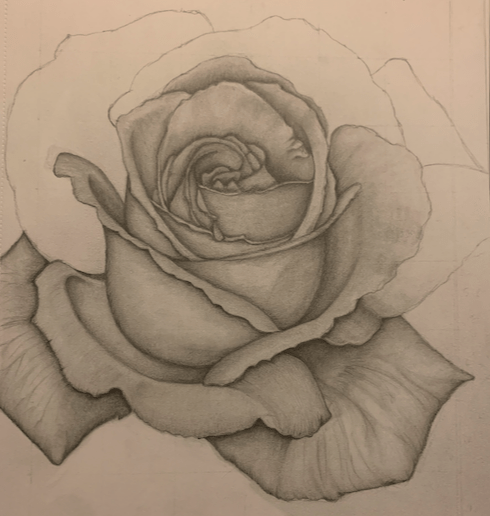
A lot of work has been completed between these two images. I found that I had to re-draw the centre of the rose, as I wasn’t happy with the composition, before I could continue with the shading and blending. I am much more happier with the changes that I made as, previously, it was looking uneven and disproportionate. The following image is the finished piece:
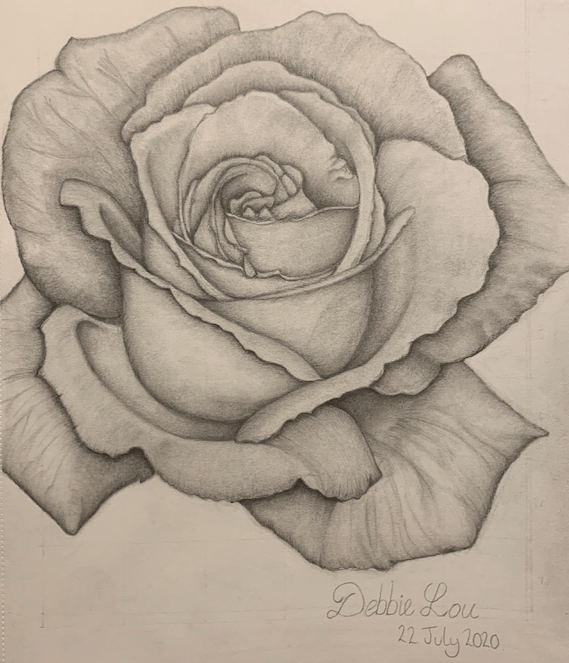
I’m really pleased with how it has turned out, especially as I have never drawn a rose before. As always, there is room for improvement, for example, some of the line work on the larger petals. I’m happy that the shading isn’t dark and that I am constantly aware that I should always begin my shading lightly so that I can build up the darkness of the shades. I enjoyed this project and will definitely draw more flowers, but perhaps add something else to the picture as well.
